课程 27 - 吸附与对齐
吸附是一种常见于图形编辑器应用中的功能,其核心思想是在元素移动、绘制或缩放时,自动将其边界或锚点对齐到最近的像素网格线或者其他图形上,本节课我们就来介绍它们的实现。
网格吸附
在 课程 5 - 绘制网格 中我们介绍了如何高效绘制直线网格,在一些拖拽交互例如移动和绘制时,吸附到网格的最小单位,能保证图形的位置或者几何信息为整数。这个功能在 Figma 中被称为 “Snap to pixel grid”,在“用户偏好设置”中可以开启。
我们在应用状态中增加两个配置项:
export interface AppState {
    snapToPixelGridEnabled: boolean;
    snapToPixelGridSize: number;
}
实现这一功能,首先需要计算世界坐标系下点的坐标。当用户拖动、缩放、绘制图形时,获取当前的坐标(如 x, y),然后将该坐标四舍五入到最近的整数(像素点)或者指定的 grid 间距:
// Snap to custom grid (e.g. 10px)
function snapToGrid(value, gridSize = 10) {
    return Math.round(value / gridSize) * gridSize;
}
然后在所有需要计算世界坐标系下点的坐标的 System 里(例如 Select、DrawRect)中,都应用这个处理函数:
let { x: sx, y: sy } = api.viewport2Canvas({
x: prevX,
y: prevY,
});
let { x: ex, y: ey } = api.viewport2Canvas({
x,
y,
});
const { snapToPixelGridEnabled, snapToPixelGridSize } = api.getAppState();
if (snapToPixelGridEnabled) {
sx = snapToGrid(sx, snapToPixelGridSize);
sy = snapToGrid(sy, snapToPixelGridSize);
ex = snapToGrid(ex, snapToPixelGridSize);
ey = snapToGrid(ey, snapToPixelGridSize);
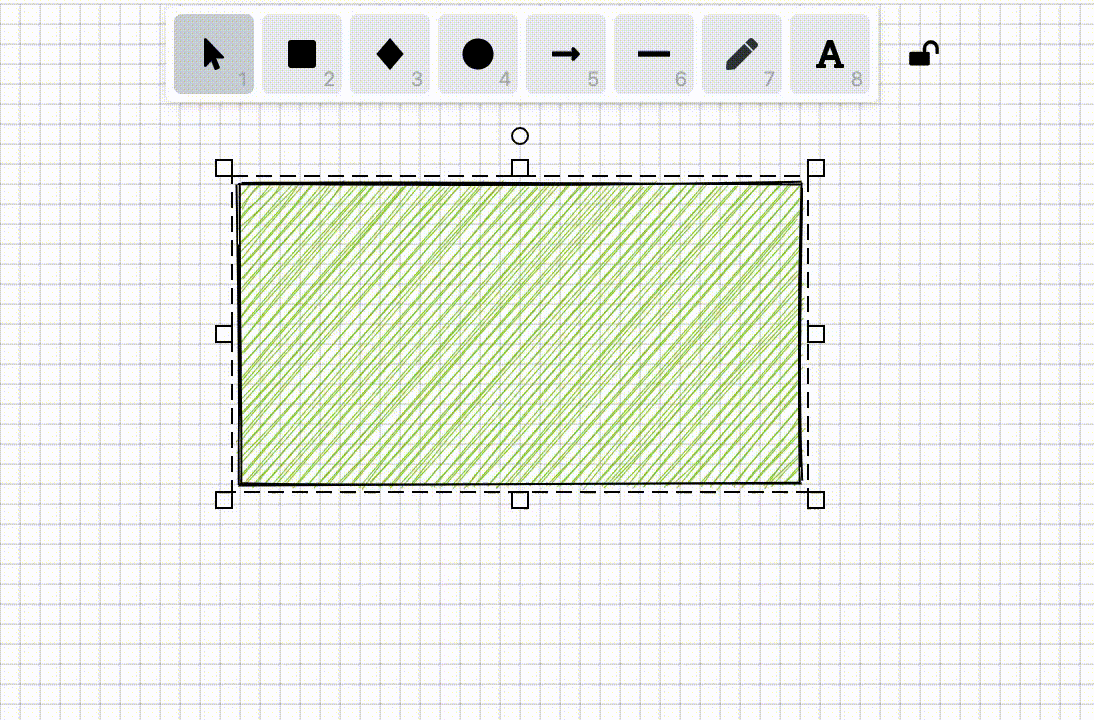
}在下面的例子中,我们将 snapToPixelGridSize 设置成 10,你可以通过拖拽移动、绘制来感受效果:
对象级吸附
Excalidraw 中的 snapping 功能实现分为以下几个关键步骤:
- isSnappingEnabled 检查当前操作是否允许吸附
- getPointSnaps 计算所有可吸附的点和间隙
- snapDraggedElements / snapResizingElements 拖拽/缩放时实时计算吸附偏移和辅助线
- renderSnaps 把 snapLines 传递到 UI 层,canvas 上渲染辅助线
下面我们参考以上步骤来实现。
检查是否允许吸附
我们在应用状态中增加以下配置项,同样可以在“偏好菜单”中开启:
export interface AppState {
    snapToObjectsEnabled: boolean;
}
在拖拽移动和绘制图形时触发:

计算可吸附点
可吸附点分成两类:被选中的图形与其他图形。对于选中的一个或多个图形,常用的可吸附点包括包围盒的四个角和中心:
const { minX, minY, maxX, maxY } = api.getGeometryBounds(
    elements.map((id) => api.getNodeById(id)),
);
const boundsWidth = maxX - minX;
const boundsHeight = maxY - minY;
return [
    [minX, minY], // corners
    [maxX, minY],
    [minX, maxY],
    [maxX, maxY],
    [minX + boundsWidth / 2, minY + boundsHeight / 2], // center
] as [number, number][];
考虑性能,我们应该尽量减少被选中图形吸附点与其他所有图形吸附点的检测次数。类似问题我们在 课程 8 - 使用空间索引加速 中已经介绍过了,只检索视口范围内的图形即可。
const unculledAndUnselected = api
    .getNodes()
    .map((node) => api.getEntity(node))
    .filter((entity) => !entity.has(Culled) && !entity.has(Selected));
同样计算出这些图形的可吸附参考点:
const referenceSnapPoints: [number, number][] = unculledAndUnselected
    .map((entity) => getElementsCorners(api, [api.getNodeByEntity(entity).id]))
    .flat();
接下来用被选中图形的可吸附点与其他图形的依次对比,找到在水平或者垂直方向上更接近的一组点,记录下两者的距离差作为后续的吸附距离:
nearestSnapsX.push({
    type: 'point',
    points: [thisSnapPoint, otherSnapPoint],
    offset: offsetX,
});
minOffset[0] = Math.abs(offsetX);
当所有可吸附点都计算完成后,就可以用这个最小距离作为吸附距离了。值得注意的是此时图形还没有根据吸附距离移动,因此我们需要假设图形已经移动到最终位置,再计算一轮:
// 计算第一轮的吸附距离
getPointSnaps();
const snapOffset: [number, number] = [
    nearestSnapsX[0]?.offset ?? 0,
    nearestSnapsY[0]?.offset ?? 0,
];

// 清空
minOffset[0] = 0;
minOffset[1] = 0;
nearestSnapsX.length = 0;
nearestSnapsY.length = 0;
const newDragOffset: [number, number] = [
    round(dragOffset[0] + snapOffset[0]),
    round(dragOffset[1] + snapOffset[1]),
];

// 再进行一轮计算,但需要考虑新的偏移量
getPointSnaps(newDragOffset);

// 渲染最终的辅助线
计算间隙
画布中除了当前被选中的图形,其他图形两两又可能形成一组间隙,Excalidraw 代码中的图很形象,以 horizontalGap 为例:
// https://github.com/excalidraw/excalidraw/blob/f55ecb96cc8db9a2417d48cd8077833c3822d64e/packages/excalidraw/snapping.ts#L65C1-L81C3
export type Gap = {
    //  start side ↓     length
    // ┌───────────┐◄───────────────►
    // │           │-----------------┌───────────┐
    // │  start    │       ↑         │           │
    // │  element  │    overlap      │  end      │
    // │           │       ↓         │  element  │
    // └───────────┘-----------------│           │
    //                               └───────────┘
    //                               ↑ end side
    startBounds: Bounds;
    endBounds: Bounds;
    startSide: [GlobalPoint, GlobalPoint];
    endSide: [GlobalPoint, GlobalPoint];
    overlap: InclusiveRange;
    length: number;
};
如果被选中图形的包围盒与 Gap 没有重叠,则跳过检测。
for (const gap of horizontalGaps) {
    if (!rangesOverlap([minY, maxY], gap.overlap)) {
        continue;
    }
}
依次检测中心点、右侧和左侧边缘:
// center
if (gapIsLargerThanSelection && Math.abs(centerOffset) <= minOffset[0]) {
}
// side right
if (Math.abs(sideOffsetRight) <= minOffset[0]) {
}
// side left
if (Math.abs(sideOffsetLeft) <= minOffset[0]) {
}
如果满足条件则记录,过程中持续记录最小距离:
const snap: GapSnap = {
    type: 'gap',
    direction: 'center_horizontal',
    gap,
    offset: centerOffset,
};
nearestSnapsX.push(snap);
渲染辅助线
和 课程 26 - 套索工具 中类似,在视口坐标系下的辅助线也可以绘制在 SVG 容器中。
可吸附点通常使用“叉”表示,点之间的连线使用 <line> 渲染即可。
renderSnapLines(
    api: API,
    snapLines: { type: string; points: [number, number][] }[],
) {
    const { svgSVGElement } = this.selections.get(api.getCamera().__id);
    this.clearSnapLines(api);

    snapLines.forEach(({ type, points }) => {
        if (type === 'points') {
            const pointsInViewport = points.map((p) =>
                api.canvas2Viewport({ x: p[0], y: p[1] }),
            );
            const line = createSVGElement('polyline') as SVGPolylineElement;
            svgSVGElement.appendChild(line);
        }
    });
}
对于间隔线的展示,excalidraw 的注释非常形象,我们在此基础上可以在辅助线的下方(水平方向)或者右侧(垂直方向)增加表示距离的文本标签(类似 Figma 那样):
// a horizontal gap snap line
// |–––––––||–––––––|
// ^    ^   ^       ^
// \    \   \       \
// (1)  (2) (3)     (4)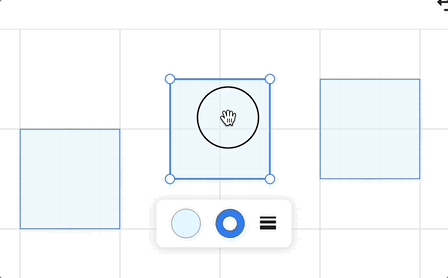
你可以在下面的例子中移动中间的矩形体验效果: